I guess sandpaper is the way to go. Is there any do’s or donts to think about?
There are a number of people here on the forum who have either built western fly rods previously or modified tenkara rods, so I’m sure you’ll get some good advice. I’m just not one of those, haha.
1 Like
A little at a time is best, you can’t go backwards after all. It would be nice if
you had access to a lathe though.
2 Likes
Good advice, always important to keep that in mind. I’ll go slow with fine paper.
A lathe would be great, don’t think anyone I know have one though.
Apologies, as I’m not a rod builder, I don’t know the technical terms for what I describe here.
I’ve seen a few people who’ve made “homemade” lathes by taking a continuously variable speed electric motor and attaching a rod chuck from a rod drying setup to hold the rod. Then taking ball bearing wheels from a rod dryer to support the opposite end. It’s a lot less expensive (or so I’ve read), especially if you already have an electric motor. But you also have the risk of screwing up your rod. Just a thought.
Edit: By just don’t a quick search on eBay, it seems you could also make your own chuck. Take a PVC plumbing pipe cap and tap 3 equidistant holes. Then use three plastic screws to hold the rod in place. Then you’d just need to figure out how to attach it to the electric motor (should be easy enough). See below.

Here’s an example of a support for the other end.
1 Like


Hey buddy, I shape with sandpaper, a few strokes, rotate, a few strokes rotate, pick up and rotate, rotate, rotate, rotate…
Work slowly and rotate.
You can also do it with a drill and your rod wrapping support. Use a wood dowel and some plumbers tape into the butt end of the rod. Work slowly, take off material at a slow rate. Have measurements written down and a caliper to keep your work honest.
More in the link above.
Share your work with us ok?
3 Likes
Really solid advices guys! Thanks!
And yes, I’ll share some pics on how it progresses!
I just read your blog post about changing the handle @anon86692127 and I like it. Nicely done. I’ve contemplated changing mine but have been very hesitant to do so out of fear of screwing up my rod. You make it seem relatively easy as long as you take things slowly.
Someone said it, “you can take it away but you can’t put it back.”
I’ll use sand paper in a slow process. There’s no rush at all since everything is pretty much frozen. I also have two of these handles so if something bad happens I have a spare.
1 Like

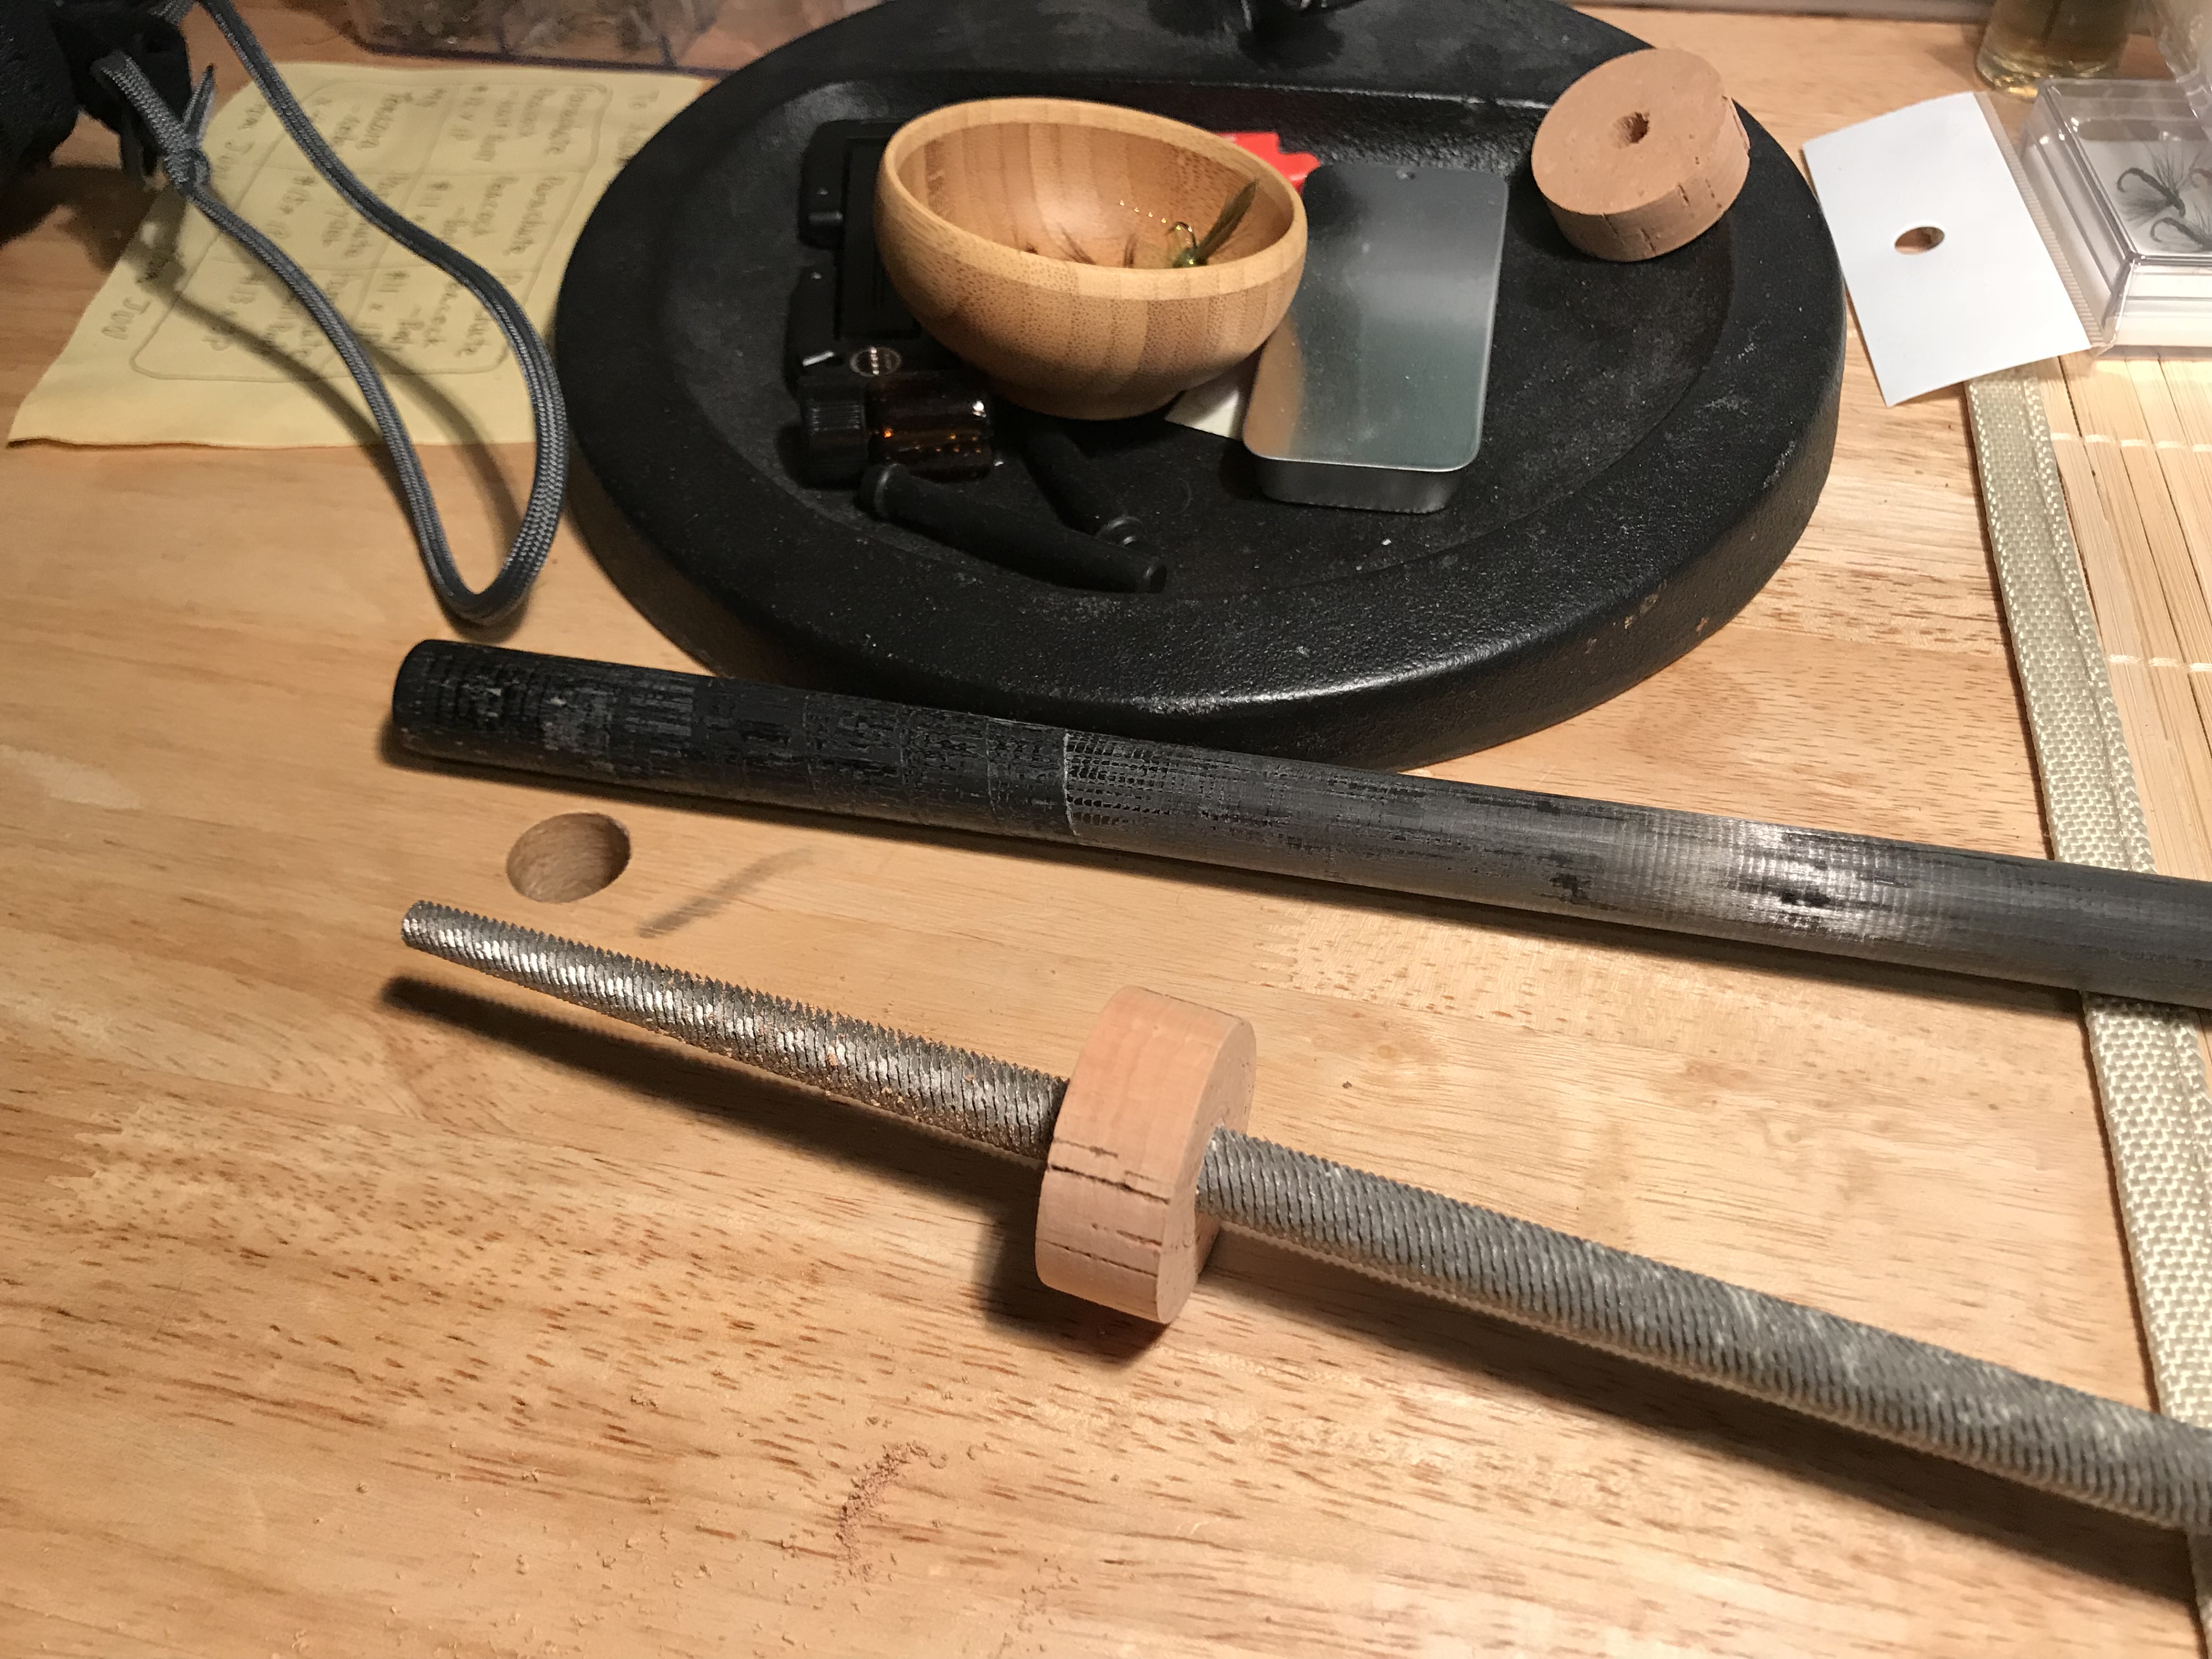
I am currently replacing the handle on my Amago. I want a cylinder grip for the style of tenkara I will be doing with it.
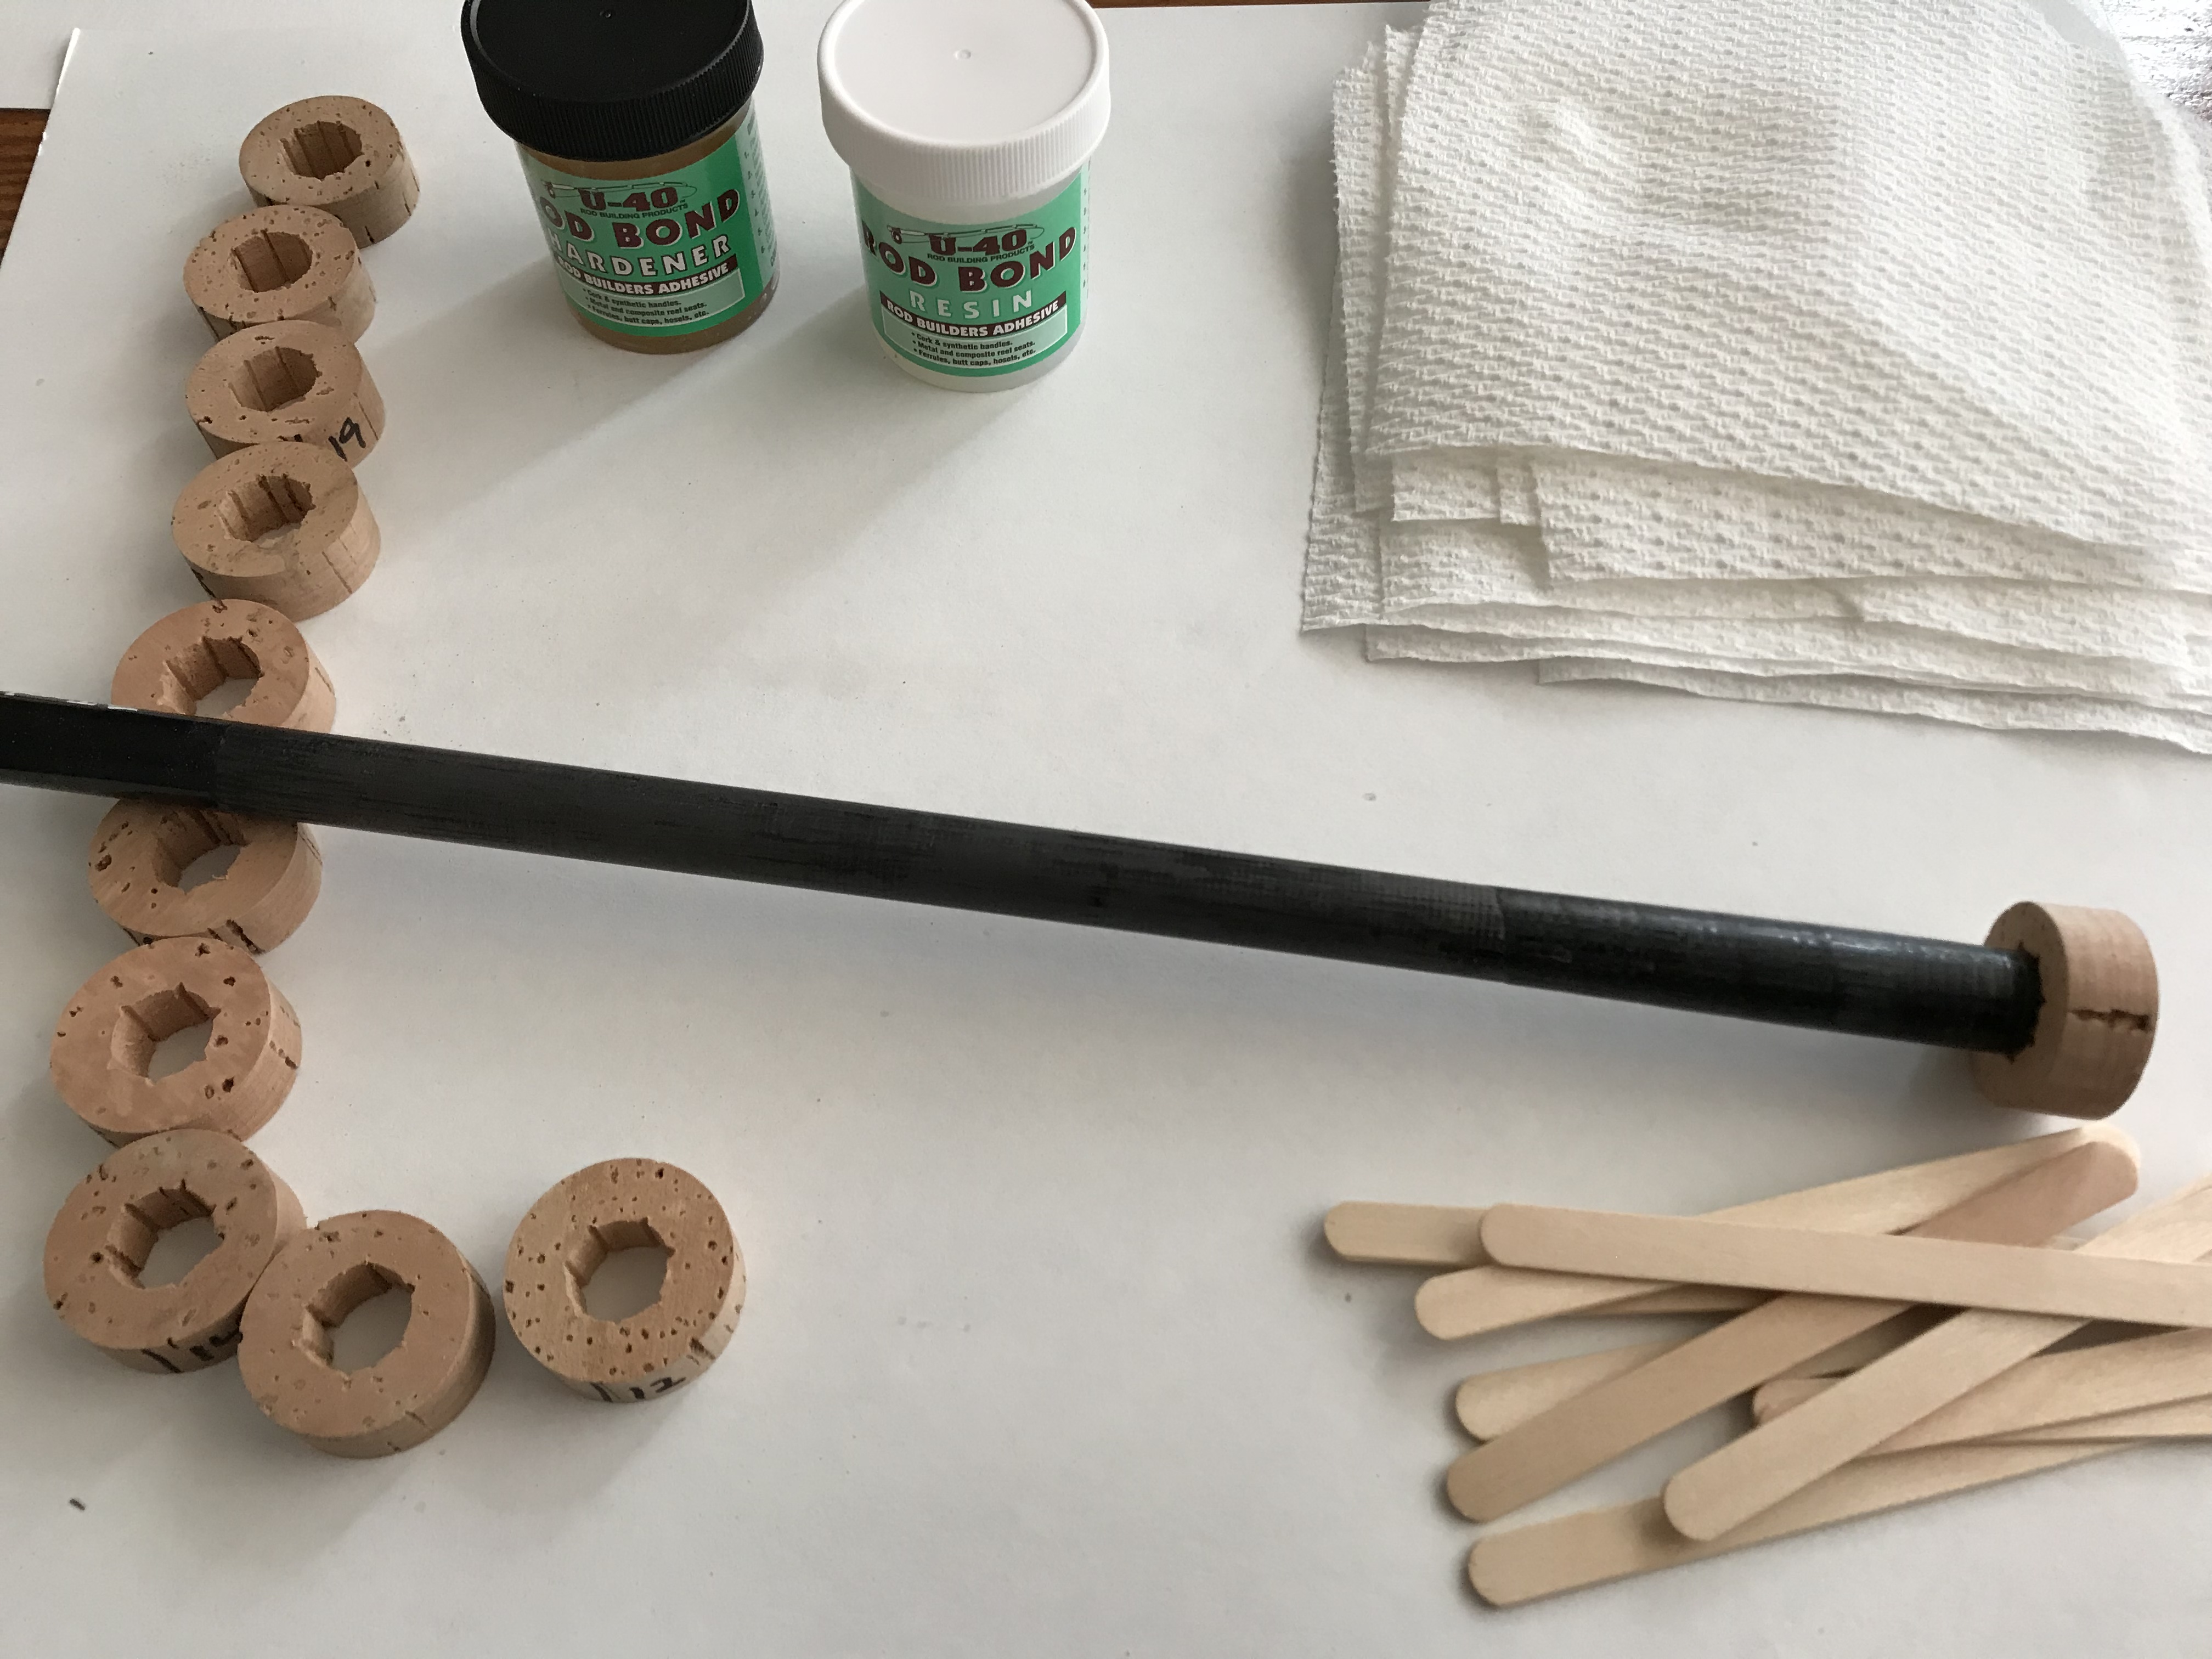
The cork is removed with a small knife as pictured. The blank scraped clean.
It takes a a grip of 12” so 24 ea .5” rings.
I found good rings for about $35 for 30ea. That gives me a few to cull.
I think I will detail the process here at this thread.

3 Likes
Interesting! Looking forward to watch the process.
I’m getting to it with my project soon. (Being a train conductor in a snow caos means a lot of work, haha)
1 Like
I received my cork today, not the best but it will do. I sort it by looking for the best couple of rings out of the bunch to be the ends of the handle. I then cull out the worst rings to get the total of rings needed for a handle.

3 Likes
I finished my rod handle and will update soon. It turned out fantastic, they always do.